Friday 17 June 2011

Puppet Carving Course: Last day :0(

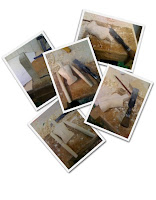
Today has been my last day on the wonderful puppet carving course, by John Roberts.
 
We spent this morning finishing and prepping the joints for fixing,  this afternoon. We had a look at my little one arms, the joint we had original plan were just not going to fit, as she is so small. We had a re-thing and decided that strung joints instead of leather would work the best. The sad thing is you have to glue the string into the body and the glue takes 24 hour to dry so unfortunately she is arm less until tomorrow.
 
I did manage to get all her components finished and she is fitted together with wire pins until I completely finish her and then I can permanently fix all the joints of which she has 15.
 
Its strange my little one, who is still unnamed, has grown over the week. She started off on Monday morning with a pencil drawing and as the days have gone on, little bits of her have been carved and placed on top of the sketch. It was not until today, when the head joined her body that she really came to life.
 
Her arms will be add over the weekend and I will blog with the finished pics.I have had a very enjoyable week. the course was run amazingly well, the tutor was brilliant, incredible attentive and very knowledgeable, all of my fellow class mates were great fun to be with especially as we were together for 13 hours a day for the whole week and the B&B that i referred to earlier on this weeks, is actually my parents in laws house. They have been wonderful hosts letting me treat there house like a hotel and taking me back and forth to collage, I would not been able to go on the course without them  I feel like a very lucky girl having married into their family. So thank you M & D . xx

Puppet Carving Course: Day 4

Today is the last full day of my carving course. It has been a marathon of aclass today staring at 8:30 this morning and finishing just after 10 this evening, but I think I can say with that by 3:30 tomorrow afternoon I will have a full jointed and working puppet.
 
I spent most of the morning carving out her hip joints. It was a slow process taking little bits of wood away, then fitting the leg in place, seeing how it sat and the range of movement, then taking it apart and carving a bit more, you just have to keeping going until its sits perfectly then you have to start all over again for other leg. The idea is that the leg will look and look and sit evenly in all positions. She is going to be living on a shelf in my work room,spending most of her life sitting down, so I needed to make sure that this position looks perfect which meant the hips had to be carved quite a bit.
 
My tutor has a really clever way of carving hands. He got us to drew of the shape of the hand we wanted, palm face up. Then measure the width, and add half again. This is the depth of the block of wood needed. Trace the design onto the wood and cut with the bandsaw. You then carve either side of the wood block so that they are a mirror image of each other, they are the backs of the hands. Spit the wood block and carve the insides. This means that if your puppet has small hands they are easier and less fragile to carve.
 
I have wanted to make a movable waist joint for a while now, but I was not sure how to do it in wood. I talk to John my tutor about it and it was something that he had never done before either. We sat down together with off cuts of wood and bits of paper and worked out a mechanism that would allow the waist to twist and bend slightly forward. Then came the real test, seeing if it worked on my puppet. Tentatively I carved out the sections of wood and hollowed out the body. Surprisingly it all fitted with very little effort. Now she had a very lovely moving waist.
 
I also managed to find time to make her feet a lot smaller and they are now in proportion with the rest of her body, at one stage yesterday they were larger than her head. I have no idea how I managed to make them so big, when everything looked OK on my drawing. Anyway they are dainty now and also have been fitted to her legs with a joint that allows her foot to have a slight rock when she walks.
 
At about lunch time I felt this wave of stress rush over me, I suddenly became very aware of how little time, I had left on the course. It was probably inevitable I would feel like that. These types of courses are so very intense and we have been putting in 13 hour days all week. I want to get as much as I can out of it and learn every thin I can. So I can go home and do it all again in the shed. I had some tea, a a little break and felt a bit better.
 
I am very tied. I'm looking forward to laying in for a bit on Saturday and just being lazy. I have so many ideas that on Sunday I think I will start a new doll.

Wednesday 15 June 2011

Puppet Carving course: Day 3

Day 3 and we are now well over half way into the course. There still seems so much to learn before we can finish our puppets.
 
Today was mostly spent working on the head. The technique we are learning is called sketch carving. Using as wide  (about 2.5cm/ 1" wide) single bevel, flat chisel, you make as few cuts as possible to get the overall shape. I really didn't think, I would like this style of working but I'm very much converted. Once the wood block is cut to a rough head shape on the band saw their are only 10 cuts made before you get a usable head. Its still very rough but has a charm of its own. I have cut out quiet a lot of heads at home, learning from books and YouTube but nothing has been as effective and simple as this technique
 
The class has few rules the main one is NO sand paper. This is really hard for me as all of the carving is normally done using a mix of hand and power tools with a lot of sanding to even out the shape.
In traditional Chinese puppet carving (which is what our course is based on) they only use 5 tools and no sand paper. All the smoothing and fine detail is done with exactly the same chisel as the carving. You hold the chisel like pencil and take very small amounts of wood away. It takes ages and I did start to fell as if I was going around in a circle, just is I smoothed one bit, I had to go back and re-smooth another. I think it will be worth it in the end.
 
If the head was not enough. I have also got slightly smaller feet ( if you read yesterdays blog,it makes sense) and hips, really massive hips, the puppet not me!. The hips are made in three parts. This is so you can change the direction of the wood grain in each part, to make sure they are as strong as possible. I have glued them together and they are in the vice ready for work tomorrow.
 
I think that it will be a long day tomorrow. As its the last full day, I plan to work until the collage closes at 10 just to make sure she is fitted together. I don't think she will be the most beautifully puppet I have made, but she will be fully functioning with perfectly working joints which is what I wanted to learn from this course.
 
Off to bed. No time for dreams to night just sleeping ready for a busy day.

Tuesday 14 June 2011

Puppet Carving course: Day 2

Today has been another long day, but extremely enjoyable. John our tutor gave a spectacular show and tell from his time studying in China and a beautiful performance with one of the marionettes he made whilst he was there.
 
We were tackling the knee joints today, I started out this morning a little tied, but excited non the less by tea time (10:30) I was frustrated and exhausted. The maths involved in creating the perfect knee joint is way beyond anything I really coincided and maths has never been my strongest subject. Lots of measuring, using protectors and set squares. Today's key word was "accuracy". Accuracy is not something I find very easy, I struggle getting a straight line with a ruler, I'm more of a do it and see what happens kind of girl. Saying that by lunch time I had cracked it and once all the all the marking out was done, I could get on and carve. I have to admit, that it was worth all the frustration as the joints are lovely. They hang well and are ascetically pleasing. I think I will have to do some more practise at home but accuracy does make for nice joints.
 
The knees and hips have been drilled, I have chosen to have a socket type hip joint, this does not allow as much movement as leather strap joints (floppy joint) would, but they look much niether and these are the type of joint I would like to adapt for my dolls. We will be working on the hip sockets for them to fit in tomorrow.
 
Then came the feet, these will also be jointed. The ankle/foot joint for a puppet can't allow the toe to fall first, as it creates difficulty when walking them, they sort of trip over there own feet. The joint | will use is a slot joint, it allows a little back and forth movement that should give her a nice flick when she walks. John has told us that the feet need to be cut quiet a bit larger than their finished size to allow for the joint to work and still have the strength in the wood so as it does not split. I will have to just trust him on this, as at the moment they just look enormously out of proportion.
 
So tomorrow we will tackle the head. We are going to learn how to "sketch carve" the face. I think this means that we make some quick sharp cuts that give the impression of a face and features but is not finished. I'm not very good at abstract, I like to detail, so we will see how I get on with that.
 
My class is great, its a real mix of people all off us with very different levels of experience but all very willing to lend each other a hand were we can. I'm also staying in a first class B&B it has very hospitable hosts, excellent transport facilities, hot baths, tea making facilities  is very clean a comfy bed after a long day. I can highly recommend it.
 
Off now to bed to dream of all sorts of exciting creations. I have some ideas involving leather on puppets, but more of that in another blog

Monday 13 June 2011

Carving course with John Roberts: Day 1

John Roberts is one of Britons most acclaimed master puppeteer's. His company Puppetcraft tour all over the world and he makes puppet for the likes of Jim Henson and the Royal Shakespeare company. This week I am lucky enough to be participating in one of his workshops. Run at West Dean Collage in Sussex it is the first one that John has run here, but he has been teaching for many years. 
My class in made up of 7 very enthusiastic amateur puppet carvers. All with varying levels of experience, using different mediums.  For this course we will be carving marionette or rod puppets from wood either lime (my favorite wood to carve) and Jellitong.
This mornings class began with us being handed a piece of paper and told to draw our ideas. I had been a bit off a swat and done some sketches in the right sort of size before I arrived. We then gathered in the middle of the room and each of our drawing were talked through, so the bits that would work the ones that would not, what we needed to consider when carving the puppet, things like which way the wood grain runs and how strong a certain section needed to be. Then we all went back and made the relevant alterations. As always my puppet is the smallest must peoples are about 26" mine will be lucky if she is 17" when finished. I don't know why I find making big things so difficult but I do, I did try and get away with making her about 12" but he would not let me.
Once our designs are finished we needed to consider which type of joints we would use. Most puppets have several different types depending on their size and what sort of performance you want them to give. I really am not bothered as to how beautiful or functional my little one is, all I want to do is learn as much as I can in the 5 days. So We have decided that mine will have the joints that I will find the most useful when it comes it making my dolls as well as the puppets.
After tea (there are a lot of tea breaks on this course, but they are at set times so not to bad) we cut out the chest, this is the top half of the body. The body is drawn as one piece but made as two, this give you optimum movement. We spent much of the day carving this to shape. The arms were cut out next they are cut in one piece but will be split to insert the elbow joint. I will be using a leather joint for this, they are simpler to make than a spilt joint and less time consuming. Its also one of the major joint types that are used in puppets of her size. The arms are simply rounded off and will be shaped more once the joint is in.
Today was a long day, 13 hours of wood carving. It was very enjoyable and the time passed quickly but I am tied, I will go to bed dreaming of puppet joints tonight, I think. I want to get the most out of this class and 5 day is not really very many so I have to pack as much learning in as I can, but I can always come back next year as well.

Tuesday 31 May 2011

New Head!

I have been starring at the head I was working on last week, for a few days now, I just don't like it. I can not work out how to fix it or make it look any where near how I wanted it,  so rather than spending lots of frustrating hours trying to fix it or ending up with a head the size off a peanut. I have decided  cut a new one.
 
I have used the same pattern as for the previous head but, I will carve it very differently this time.
 
Using  the band saw I cut out the rough shape, and then I sanded  off the rough bits and rounded the edges. This makes it a lot easier to carve in the long run. I have cut away the excess wood around the nose, so that I have an good idea of were the rest of the features will fit. Over the next few days I will do a lot more to get the head to a rough finished state.
 
I am taking a Puppet Carving class in a few weeks, and one of the things the tutor has asked is for the students to bring any of their own work, I want to get this doll to a stage were all the carving is done and she only has sanding left to do.

Thursday 26 May 2011

New Idea's

It has been a little while since I blogged. After the excitement of making the puppet for the carnival, I needed a few days rest from carving, but my brain would not stop working and  I have been busy filling my sketch book with idea's and new project's. 
 
These picture are of a doll I started last year, I first sketched her in Japan, this time last year when I was inspired by an exhibition of dolls at the "National Museum of Modern Art, Tokyo" there was an amazing doll made of cloth by Kazuyo Oshima.
 
The drawing sat he in my sketch book for a good few months, then just before New Years I cut out the body, that then just sat on my desk for a few more months, then finally I started the rest of her. I carved her face back in February and she has been sitting watching me as I made puppet. Her face just was not right. I fiddled with it a bit but could not get it to look like my original idea.
 
So today I have sanded her back so that I can start carving her feature's in again. Her face was very flat and square so I have rounded her off. I will work on her more over the coming days and keep the blog up to date. x

Sunday 15 May 2011

All finished!

So her she is all finished and on the carnival float by 11.30, and the float that we were on won first prize in it category
She sat on the edge of the boat (float) waving at the people. It was the first time that I have ever really shown off anything that I have made to anyone other than close family and friends but I have had such nice comments and it was so nice to see little children looking at her and smiling.
The dress is just a tempery one. It’s not as well finished as I want it to be, I did cut the timing a bit fine, but I’m sure that was half the fun when making her. I will use the same dress pattern, but add lots of embellishment. It does need to be fit for a sea nymph after all.
I love the colour of the fabric that I chose but it’s a little bit stiff and does not drape very well. I’m going to look for some new fabric next week, or I may dye some silk and put chiffon over it with lots of lovely beads.
I’m kind of sad that she is finished. I feel a little bit lost today. For the last few weeks, I haven’t once sat down and not thought about her in some way.
I do have lots of ideas for what to make next. So I will keep the blog up to date.
Thank you for following me on this project. I could not have made her without the help and support from my husband who has been my sounding board and a much needed second pair of hands. Thank you. XX


Friday 13 May 2011

Just one day to go.

Just one day left now. I'm pretty sure that we are on target. It may mean a late night tonight but no matter what she will be on the float waving at people for 11.30am.
 She now is fully pained and has, had her first coat of vanish this morning. I have left it to dry and will sand and re-vanish her as soon as I get home. She will be dry in a couple of hours so I can add her hair.
 When i was painting her last night I l thought that they she just looked a bit flat, I had some gold paint that i purchased from a trade show, it’s like gold leaf in a tube and i have rubbed a small amount of that onto her. I don’t think you can see it in these pictures but it has really given her the depth she needed. I have carried on the gold theme on to her face using it like a highlighter.
 I have chosen a satin finish varnish as I like the way that it reflects the light, matt really would not have worked on her as she is meant to be a Sea nymph, but I did not want her to have a wet look so gloss was not right either.
 I am still quite pleased with her. It will take me a while to really know how I feel about the things I make, I find that because I spend such an intense amount of time on a project, I end up with tunnel vision. I have often made something and really not liked it at all, so put it in a cupboard, only to bring it out a few months later and think, "Oh, it was not really as bad as I though".

Wednesday 11 May 2011

Going Green.

I sealed the wood yesterday morning and sanded and painted the head and joints last night. I got up very early today, and have used a very fine sand paper to smooth off the surface and have put on a second coat of the stain.
 
I spent some time last night mixing colours, I'm very please with one and it looks really nice with the hair that i have already dyed.
 
So tonight i will put her together and the give her the first coat of paint. If I have time I will start the hair.